Hairstyles for American Holidays

Hairstyles for American Holidays:

Introduction

American holidays are a time for celebration, and what better way to get into the festive spirit than by creating a holiday-themed hairstyle? Whether you’re attending a Fourth of July barbecue, a Halloween party, a Thanksgiving dinner, or a Christmas gathering, your hairstyle can play a big role in completing your look. Not only can a holiday-themed hairstyle be a fun way to show off your creativity and personality, but it can also help you feel more festive and in tune with the holiday spirit. In this post, we’ll provide you with hairstyle suggestions for different American holidays, along with tips on how to create these looks at home.

Hairstyles for Fourth of July

The Fourth of July is a significant holiday in the United States, celebrating the country’s independence. It is typically celebrated with parades, picnics, barbecues, and fireworks. Dressing up in patriotic colors and themes is a common tradition for the holiday, including hairstyles that show off red, white, and blue.

For Fourth of July hairstyles, incorporating the colors of the American flag is a fun and festive way to show off your patriotic spirit. One hairstyle suggestion is to create braids with red, white, and blue ribbons woven throughout the hair. Another option is to create a top knot or bun and accessorize with a flag headband or hair clip.

These hairstyles are perfect for a Fourth of July barbecue or outdoor party and will add a touch of patriotism to your overall look.

Hairstyles for Halloween

Halloween is an exciting time for people of all ages, and dressing up in creative costumes is a fun and popular activity. However, a costume is not complete without a hairstyle that complements the overall look. In this section, we will provide hairstyle suggestions that will help you to create a memorable and spooky Halloween look.

Hairstyle Suggestions: To complement popular Halloween costumes, here are some hairstyle suggestions:

  1. Wavy Mermaid Hair:
    For those who are dressing up as mermaids, creating wavy, beachy hair can complete the look. Use a curling iron to create loose waves, and add some sea-inspired accessories like seashells or starfish.
  2. Messy Bun for Witch Costume:
    For a witch costume, a messy bun can add to the spooky effect. Add some black or green temporary hair color and a pointed hat to complete the look.
  3. Space Buns for Star Wars Character:
    If you’re dressing up as a Star Wars character, consider creating space buns, which are a popular style worn by Princess Leia. You can add some silver glitter hairspray to make the style pop.
  4. Fishtail Braid for Merida:
    If you’re dressing up as the brave and adventurous Merida from Brave, consider creating a fishtail braid. This hairstyle will give you the perfect warrior princess look.

Hairstyles for Thanksgiving

Thanksgiving is a beloved American holiday that brings families together to celebrate gratitude, good food, and quality time. The holiday’s cozy and relaxed atmosphere makes it the perfect occasion to showcase effortless yet stylish hairstyles that complement the festive vibes. Here are some hairstyle suggestions for Thanksgiving that are simple and low maintenance, allowing you to focus on enjoying time with your loved ones.

Discuss the family-oriented and cozy nature of Thanksgiving and how it is celebrated.

Thanksgiving is a holiday that celebrates family, community, and togetherness. It is a time to express gratitude and appreciate the blessings in our lives, as well as indulge in a delicious feast with loved ones. The holiday is also known for its cozy and relaxed atmosphere, with people often dressing in comfortable and casual attire.

Offer hairstyle suggestions that are simple and low maintenance, such as loose waves or a low ponytail with a fall-colored hair accessory.

When it comes to Thanksgiving hairstyles, simplicity is key. Loose waves are a classic and effortless style that can be achieved with a curling iron or hot rollers. Adding a touch of texture or volume with dry shampoo or hairspray can elevate the look. Another easy option is a low ponytail or bun, which can be accessorized with a fall-colored hairband, scrunchie, or ribbon to add a festive touch.

For those who prefer more intricate styles, braids can be a great option. A simple, loose braid or fishtail braid can add an elegant and effortless touch to any Thanksgiving outfit. A braided crown or milkmaid braid can also be a great choice for a more formal family dinner.

By opting for simple and low maintenance hairstyles, you can spend less time worrying about your hair and more time savoring the joys of the holiday season with your loved ones.

Hairstyles for Christmas

Christmas is a festive and joyous time of year, full of decorations, carols, and gift-giving. It’s also a time when people love to dress up and look their best, whether it’s for a holiday party or a family gathering. That’s where holiday-themed hairstyles can come in.

One popular option is to incorporate holiday elements into a traditional updo, such as a braided updo with holly berries or a glittery headband with a sleek low bun. For those who prefer to wear their hair down, loose waves with a sparkling hair clip can add a touch of holiday glamour.

Another fun option is to use Christmas colors and motifs in your hairstyle. For example, a half-up hairstyle with red and green ribbon accents, or a candy cane-inspired braid with red and white stripes. You could also try a simple low ponytail with a sprig of mistletoe tucked behind the ear.

Overall, the key to holiday hairstyles is to have fun and get creative. Don’t be afraid to experiment with different colors, accessories, and styles to find the perfect festive look for you.

Changing Your Hair Color

Changing Your Hair Color

from Blonde to Brunette at Home

When it comes to hair color, sometimes change is necessary, and changing hair color from blonde to brunette is one of the most popular transformations. This blog post is intended for people who want to learn how to change their hair color at home without visiting a salon. In this post, we will cover the necessary steps to change hair color from blonde to brunette, including the tools and products needed. By the end of this post, readers will have a better understanding of how to safely and effectively transform their hair color at home.

Understanding hair color

In this section, we will discuss the basics of hair color and how it works. Understanding these concepts will help you achieve the desired result when changing your hair color from blonde to brunette.

First, we’ll cover the different types of hair color and how they are classified. Hair color is categorized into natural, temporary, semi-permanent, demi-permanent, and permanent. The factors that contribute to hair color change include genetics, age, environmental factors, and chemical processes.

Next, we’ll explain how hair color works and how different colors are achieved. Hair color is determined by the amount and type of melanin in the hair shaft. Melanin is a pigment that gives hair its color. Different colors are achieved by mixing primary colors, including red, blue, and yellow, and their secondary colors.

Finally, we’ll explain how the hair color change works. When changing your hair color from blonde to brunette, the process involves lightening the hair and then depositing a darker color. The lightening process involves using bleach or other lightening products to remove the natural pigment from the hair shaft. The darker color is then applied to the hair, which may require multiple applications to achieve the desired shade. It’s important to note that this process can be damaging to hair if not done correctly, so it’s recommended to take caution and follow proper hair care techniques during the process.

Choosing the right shade of brunette

Choosing the right shade of brunette is crucial when changing your hair color from blonde. There are several shades of brunette, such as dark brown, medium brown, light brown, and ash brown. To select the right shade of brunette, it is important to consider your skin tone and eye color.

Darker skin tones tend to look better with darker shades of brunette, while lighter skin tones look better with lighter shades of brown. Similarly, eye color can also play a role in choosing the right shade of brunette. For instance, people with blue or green eyes tend to look better with warm shades of brown, while people with brown eyes look good in almost any shade of brown.

It is also essential to consider the undertones of your hair when choosing the right shade of brunette. For example, if you have cool-toned hair, it is best to go for a cool-toned brown shade such as ash brown. On the other hand, if your hair has warm undertones, a warm-toned brown shade such as golden brown may be more suitable.

To select the perfect shade of brunette, you can consult with a professional hair colorist or use online hair color simulation tools that help you visualize how different shades of brown will look on you. Additionally, it’s best to choose a shade that compliments your personal style and preferences.

Preparing your hair for the color change

Preparing your hair for the color change is a crucial step in achieving the desired outcome. It involves several important steps to ensure that the hair is ready to receive the color and that the process goes smoothly.

First, it is important to properly wash and condition your hair before coloring. This will help remove any buildup, oils, or other residues that could interfere with the color process. It is recommended to wash hair 24-48 hours before coloring to allow natural oils to build up and protect the scalp.

Additionally, it is important to conduct a strand test prior to the color change. This involves taking a small section of hair and applying the hair color mixture to it. This will allow you to see how the color will look on your hair and whether it will be the right shade.

Allergy testing is also crucial to ensure that you are not allergic to the hair dye. To conduct an allergy test, apply a small amount of hair dye mixture to a small area on your skin and wait for 24-48 hours. If there is any redness or irritation, do not proceed with the color change.

Lastly, make sure your hair is completely dry before starting the coloring process. Wet hair can dilute the color and result in an uneven application. Therefore, it is best to let hair air dry or blow dry before coloring.

The hair coloring process

The hair coloring process can be a bit intimidating, but with the right tools and technique, it can be done successfully at home.

Here are some step-by-step instructions for coloring your hair from blonde to brunette:

  1. Choose the right hair color: As mentioned earlier, it’s important to choose the right shade of brunette to complement your skin tone and eye color. You should also consider whether you want a permanent or semi-permanent color. Semi-permanent color is a good option if you’re not ready to commit to a permanent change.
  2. Prepare your work area: Cover the area with old towels or newspapers to prevent staining. Wear old clothes and gloves to avoid getting hair color on your skin.
  3. Mix the hair color: Follow the instructions on the hair dye box to mix the color. Make sure you mix it well to ensure an even hair color.
  4. Apply the hair color: Apply the hair color to your hair, starting from the roots and working your way down to the ends. Be sure to saturate all of your hair with the hair color.
  5. Wait for the color to develop: Follow the instructions on the hair dye box to determine how long you should leave the color on. Be sure to set a timer so you don’t leave the color on too long.
  6. Rinse your hair: Rinse your hair thoroughly with lukewarm water until the water runs clear.
  7. Condition your hair: Use the conditioner that comes with the hair dye to condition your hair. This will help to lock in the color and leave your hair feeling soft and silky.

Tips for achieving an even hair color and avoiding common mistakes:

  • Divide your hair into sections to ensure even coverage.
  • Start applying the hair color at the roots and work your way down to the ends.
  • Use a wide-tooth comb to ensure the hair color is evenly distributed.
  • Don’t leave the hair color on for too long, as this can damage your hair and cause uneven color.
  • If you’re not sure about the color, do a strand test before applying the hair color to your entire head.
  • Avoid washing your hair for at least 24 hours after coloring to allow the color to set.

Caring for your new brunette hair color

Caring for your new brunette hair color is an essential part of the hair color change process. After you’ve achieved your desired shade, it’s important to take care of your hair to maintain the color and keep your locks healthy.

Here are some tips for caring for your new brunette hair color:

  1. Use a sulfate-free shampoo and conditioner: Sulfates can strip hair color and cause it to fade faster. Use a sulfate-free shampoo and conditioner to protect your new hair color and keep it looking vibrant.
  2. Avoid hot showers: Hot water can open up the hair cuticles, allowing the color to wash out faster. Use lukewarm water when washing your hair to keep the color locked in.
  3. Limit heat styling: Heat styling tools like flat irons, curling irons, and hair dryers can cause your hair color to fade faster. If you must use heat styling tools, be sure to use a heat protectant spray and keep the temperature low.
  4. Protect your hair from the sun: UV rays can cause hair color to fade and dry out your hair. Wear a hat or use a leave-in conditioner with UV protection to shield your hair from the sun.
  5. Get regular trims: Regular trims help keep split ends at bay and prevent breakage, which can cause your hair color to look dull.
  6. Use color-safe hair products:
    Use hair products specifically designed for colored hair, such as shampoos, conditioners, and styling products. These products are formulated to be gentle on your hair and help your new color last longer.

By following these tips, you can keep your new brunette hair color looking fresh and vibrant for weeks to come. Remember, caring for your hair is just as important as choosing the right shade and going through the coloring process.

Common mistakes to avoid

Changing your hair color from blonde to brunette at home can be a daunting task, especially if you’re new to coloring your hair. To avoid any mishaps and achieve the desired result, it’s important to be aware of the most common mistakes people make when coloring their hair at home. Here are some mistakes to avoid:

  1. Skipping the strand test:
    Before you start coloring your hair, it’s crucial to do a strand test to see how the color will turn out on your hair. Skipping this step can result in an unwanted color or uneven coloring.
  2. Using the wrong shade:
    Choosing the wrong shade of brunette can be a major mistake. It’s essential to choose a shade that complements your skin tone and eye color. If you’re unsure about which shade to choose, consult with a professional or do some research online.
  3. Overlapping color:
    Overlapping color can lead to an uneven hair color, especially if you’re using permanent hair color. It’s important to avoid overlapping color by following the instructions on the hair color kit and being careful when applying the color.
  4. Not protecting the hairline:
    Not protecting your hairline can lead to staining and discoloration of your skin. Use petroleum jelly or a barrier cream around your hairline to prevent staining.
  5. Not following the instructions:
    Not following the instructions on the hair color kit can lead to an undesirable result. Be sure to read and follow the instructions carefully, including the time to leave the color on your hair.

By avoiding these common mistakes, you can successfully change your hair color from blonde to brunette at home and achieve the desired result.

DIY from Long Locks to a Chic Pixie Cut

DIY from Long Locks to a Chic Pixie Cut

DIY Hair Transformation

Are you tired of your long locks and ready for a bold change? A chic pixie cut might be just what you need! This DIY hair transformation can give you a fresh, edgy look that’s easy to maintain. In this post, we will guide you through the process of cutting your long locks into a chic pixie cut. We’ll cover everything from choosing the right pixie cut for your face shape to the tools and techniques you’ll need to make the cut. So, if you’re ready for a hair transformation, let’s get started with this DIY hair transformation guide.

Preparing for the Pixie Cut

Tools and Products:

  • Sharp scissors and a comb:
    To ensure a precise cut, invest in a good pair of hair cutting scissors and a fine-toothed comb.
  • Mirror: A large mirror and a hand-held mirror can help you see all angles of your head as you cut your hair.
  • Hair clips:
    Use hair clips to section your hair and keep it out of the way as you cut.
  • Shampoo and conditioner:
    Wash your hair with a good quality shampoo and conditioner a day before cutting. Avoid using any styling products or oils as it can make hair slippery and difficult to manage during the cutting process.

Tips on Washing and Drying Hair:

  • Shampoo and condition your hair a day before cutting to remove any product buildup and oiliness.
  • Blow-dry your hair straight to make it easier to cut. Straight hair gives a more accurate guide to follow, and it’s easier to see the length of the hair when it’s not curly or wavy.
  • Don’t brush or comb your hair when it’s dry as it can cause breakage and split ends. Instead, use a wide-tooth comb to detangle your hair while it’s damp.
  • If you have long hair, consider cutting it into a shoulder-length bob first before going for the pixie cut. This way, you can get used to having shorter hair before going for an even shorter style.

By following these tips, you can prepare your hair for a successful DIY pixie cut.

Locks to a Chic Pixie Cut

Choosing the Right Pixie Cut

Pixie cut is not a one-size-fits-all hairstyle. Choosing the right type of pixie cut depends on various factors such as face shape and hair type. In this section, we’ll discuss how to select the perfect pixie cut for you and how to customize it to fit your individual preferences.

Pixie Cut Types:

There are various types of pixie cuts, including the classic pixie, textured pixie, asymmetrical pixie, and layered pixie. Each type has its own unique characteristics and can suit different face shapes and hair types. We’ll discuss the different types in detail and help you determine which one will work best for you.

Face Shape:

One important factor to consider when choosing a pixie cut is your face shape. Different face shapes require different types of pixie cuts. For instance, if you have a round face, a layered pixie cut may work best to add height and length to your face. Similarly, if you have an oval face, you can pull off almost any type of pixie cut. We’ll provide a detailed guide on how to determine your face shape and which type of pixie cut will suit you best.

Hair Type:

Another critical factor to consider when choosing a pixie cut is your hair type. Fine hair, thick hair, curly hair, and straight hair each require a different approach to cutting and styling. For instance, if you have thick hair, a layered pixie cut will work best to add movement and texture to your hair. On the other hand, if you have fine hair, a textured pixie cut will add volume and dimension. We’ll discuss the different hair types and provide tips on how to choose the right pixie cut for your hair type.

Customization:

Once you have determined the right type of pixie cut for your face shape and hair type, it’s time to make it your own. There are several ways to customize a pixie cut, such as adding bangs, changing the length, and adding texture. We’ll discuss different customization options and provide tips on how to achieve the desired look.

In summary, choosing the right pixie cut requires consideration of various factors, such as face shape and hair type. Customizing the cut to suit individual preferences is also crucial. In the next section, we’ll discuss the step-by-step process of cutting a pixie cut at home.

Locks to a Chic Pixie Cut-inner2
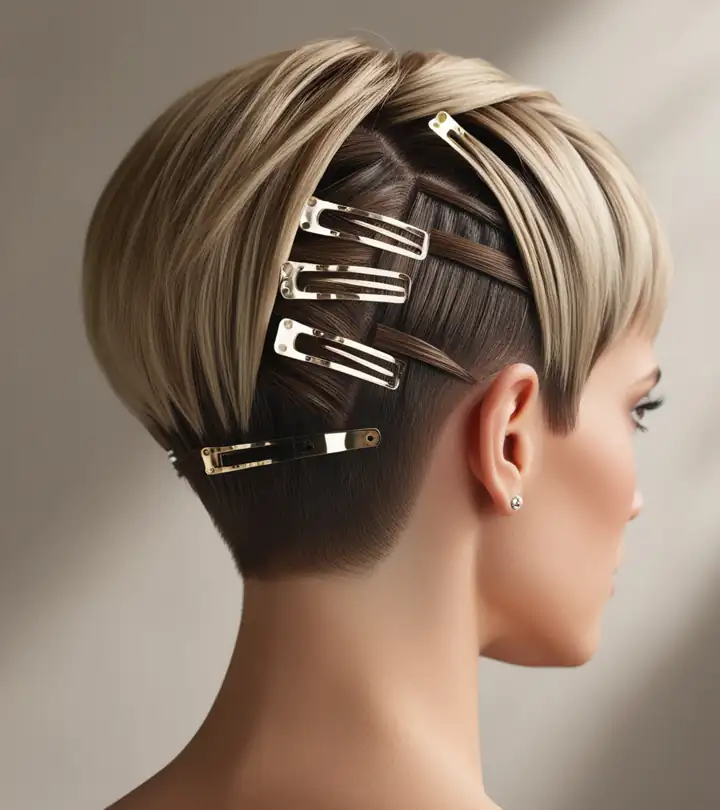
Step-by-Step Guide to Cutting the Pixie

A chic pixie cut can be achieved at home with the right tools and techniques. Follow these step-by-step instructions to achieve a professional-looking cut.

Hair Sectioning

Start by sectioning your hair into manageable sections. Use hair clips to keep the sections in place. It’s important to have a clear view of the hair you are cutting, so make sure the sections are not too thick.

Hair Cutting Techniques

When cutting the hair, use sharp scissors to create precise cuts. Start with the sides and back of the head, working your way to the top. Use clippers to create a clean, polished look around the edges of the hairline.

Hair Shaping

Once the main cutting is done, it’s time to shape the hair. Use scissors to texturize the hair and create layers, if desired. This will give the pixie cut movement and volume. Use the thinning shears to remove bulk and create a more natural look.

Polished Look

To finish the cut, use a razor to create a polished look. Run the razor over the ends of the hair to create a softer, more natural look. Use a comb to style the hair, and finish with a hair spray to hold the style in place.

By following these step-by-step instructions and using the right tools, you can achieve a chic pixie cut at home. Remember to take your time and work in small sections to achieve the best results.

Styling the Pixie Cut

Once the pixie cut is complete, it’s time to style it and make it your own. Here are some tips on how to style and maintain your new pixie cut:

  1. Hair Products:
    Invest in some hair products that are specifically designed for short hair. Look for lightweight products that add texture and hold without weighing your hair down. Try a texturizing spray, pomade, or a styling cream.
  2. Hair Tools:
    You may need to purchase some new hair tools to style your pixie cut properly. A small round brush, a flat iron, or a curling iron can help you achieve different styles.
  3. Hair Styling:
    There are endless possibilities when it comes to styling a pixie cut. You can use a round brush to add volume, or a flat iron to create a sleek and smooth look. You can also add curls or waves with a curling iron for a more feminine look.
  4. Hair Maintenance:
    To keep your pixie cut looking fresh, you’ll need to maintain it regularly. Schedule regular appointments with your stylist to get trims and touch-ups as needed.

Remember, the key to maintaining a pixie cut is to keep it polished and styled. With the right products, tools, and techniques, you can achieve a variety of looks that suit your individual style and personality.

When to Wear the Pixie Cut

When it comes to styling your pixie cut, it’s important to consider the occasion and outfit you’ll be wearing. Here are some suggestions for different occasions when the pixie cut is appropriate, as well as tips on how to pair it with different outfits:

  1. Formal Events:
    The pixie cut can be a chic and elegant option for formal events such as weddings or galas. To elevate the look, consider adding some volume to the crown of your hair with a root-lifting product. Pair your pixie cut with statement earrings or a bold necklace to complete the look.
  2. Casual Outings:
    The versatility of the pixie cut makes it a great choice for casual outings such as brunch or a day out with friends. For a playful and flirty look, add some texture to your hair with a sea salt spray or texturizing cream. Pair your pixie cut with a flowy dress or a denim jacket and jeans for a casual chic vibe.
  3. Work Events:
    The pixie cut can be a professional and polished choice for work events such as conferences or meetings. To create a sleek and sophisticated look, use a flat iron to straighten your hair and apply a shine serum to add a glossy finish. Pair your pixie cut with a fitted blazer or a pencil skirt for a classic office look.

No matter the occasion or outfit, the pixie cut can be a versatile and stylish choice. Experiment with different products and styling techniques to find the perfect look for you.

Pixie Cut FAQs

  1. How often should I get my pixie cut trimmed?
    Answer: It’s recommended to get a trim every 4-6 weeks to maintain the shape and style of your pixie cut.
  2. What should I do if I don’t like my pixie cut?
    Answer: If you’re not happy with your pixie cut, speak to your stylist and discuss options for a different style or length. Alternatively, you can try styling your pixie in different ways to see if it grows on you.
  3. How can I style my pixie cut as it grows out?
    Answer: As your pixie cut grows out, you can try different styling techniques such as adding texture or using hair accessories. You can also experiment with different hair products to add volume and shape to your hair.
  4. What hair products should I use for my pixie cut?
    Answer: Depending on your hair type and style, you may need different products such as pomade, texturizing spray, or dry shampoo. Consult with your stylist for recommendations.
  5. Can I still wear hair accessories with a pixie cut?
    Answer: Yes! Hair accessories like headbands, barrettes, and clips can add a stylish touch to a pixie cut. Experiment with different options to find what works for you.
  6. What should I do if my pixie cut doesn’t suit me?
    Answer: Speak to your stylist about what you don’t like about your pixie cut and explore options for a different style or length that suits your face shape and hair type.
  7. How can I maintain my pixie cut at home?
    Answer: Regularly washing and conditioning your hair, using the right products, and properly styling your hair can help maintain your pixie cut at home. Trim any split ends between salon visits.
  8. What should I consider before getting a pixie cut?
    Answer: Factors to consider include your face shape, hair type, lifestyle, and the maintenance required for a pixie cut. Consult with your stylist and gather inspiration photos to ensure you’re making an informed decision.
  9. How can I add some variety to my pixie cut?
    Answer: Experiment with different styling techniques, hair accessories, and hair products. You can also try adding layers or changing the length to add variety to your pixie cut.
  10. What are some common mistakes to avoid with a pixie cut?
    Answer: Common mistakes include not properly maintaining the cut, using the wrong products, and not considering face shape or hair type before getting the cut. Consult with a stylist to avoid making mistakes and ensure you’re happy with your pixie cut.

Round Faces Women Haircut

Introduction

  • Define what a round face shape is: A round face shape is characterized by a circular shape with equal width and length, full cheeks, and a soft jawline.
  • Highlight common hair concerns for women with round faces: Women with round faces often struggle with finding the right haircut that flatters their face shape, as certain styles can make their face appear wider or fuller. They may also want to add height or length to their hair to elongate their face.
  • Emphasize the importance of choosing the right haircut for a flattering look: Choosing the right haircut for a round face can make a significant difference in enhancing its features and balancing its proportions. A good haircut can help create the illusion of a more elongated face shape, sharper jawline, and higher cheekbones.

Factors to Consider

When it comes to choosing a haircut for a round face, there are several factors to consider. One of the most important things to think about is hair texture. Women with thick hair may want to consider longer hairstyles to help balance out the width of their face, while those with thinner hair may benefit from shorter styles that add volume.

Face shape is another crucial factor to keep in mind. Round faces tend to have softer features, so a hairstyle with layers or angles can help create the illusion of more defined cheekbones and a slimmer jawline. It’s also important to think about personal style when selecting a haircut. A hairstyle that complements your individual tastes and preferences will help you feel confident and beautiful.

Here are some examples of hairstyles that work well for round faces based on these factors:

  1. Long Layers: For women with thick hair, long layers can help add movement and dimension to the hair, drawing attention away from the face.
  2. Bob with Bangs: A bob haircut with side-swept bangs can help elongate the face and create a more angular look.
  3. Pixie Cut: A short pixie cut can help balance out the width of a round face and create a more dramatic look.
  4. Lob with Layers: A long bob with layers can help add volume to thinner hair, creating a more balanced and flattering look.
  5. Asymmetrical Cut: An asymmetrical cut with longer layers on one side can help create the illusion of a slimmer face and add some edge to your look.

By considering factors like hair texture, face shape, and personal style, you can find a haircut that flatters your round face and helps you feel confident and beautiful.

Best Haircuts for Women with Round Faces

When it comes to choosing a haircut for a round face, it’s essential to choose a style that flatters and balances the face shape.

Here are some of the best haircuts for women with round faces:

  1. Layered Cuts
    Layered cuts add texture and volume to the hair and can help elongate the face shape. These cuts work well for both long and short hair and can be customized based on the hair’s thickness and texture.
  2. Long Bobs
    Long bobs, also known as “lobs,” are a great choice for women with round faces who want to keep their hair long. The length of the lob helps elongate the face shape, while the layers add volume and movement.
  3. Angled Cuts
    Angled cuts, such as a long, sweeping side bang or an asymmetrical bob, can help create the illusion of a longer face shape. These cuts are especially flattering for women with round faces who have fine hair.
  4. Pixie Cuts
    For women with round faces who prefer short hair, a pixie cut can be a great option. The key is to add volume and texture to the hair to balance out the roundness of the face shape. A longer, choppy pixie cut with layers and volume at the top can be particularly flattering.
  5. Asymmetrical Cuts
    Asymmetrical cuts, such as a long bob that is shorter on one side or a layered haircut with longer pieces on one side, can help create angles and balance out a round face shape.

When deciding on a haircut, it’s important to consider the individual’s hair texture, thickness, and personal style to choose a cut that is both flattering and manageable.

Maintenance and Styling Tips

After getting the perfect haircut for a round face, it is important to maintain and style it properly to achieve the desired look.

Here are some tips to keep in mind:

  1. Use the right products: The right hair products can make all the difference in maintaining a great haircut. Use a volumizing shampoo and conditioner to add body and bounce to your hair. If your hair tends to get frizzy, use a smoothing serum or oil to tame it.
  2. Avoid certain styles: While some haircuts work well for round faces, others can make your face look even rounder. Avoid blunt bangs and very short hairstyles, as these can make your face appear wider. Instead, opt for side-swept bangs and hairstyles that add height to the crown of your head.
  3. Incorporate layers for volume: Layers can add volume and movement to your hair, which can help to balance out a round face shape. Ask your stylist to add long layers to your haircut, or try a layered haircut like a shag or a textured bob.
  4. Embrace natural texture: If you have naturally curly or wavy hair, embrace it! Curly and wavy hair can add volume and texture to a round face, and can be styled in a variety of ways to complement your haircut.

By following these tips, you can maintain and style your haircut for a round face to achieve a flattering and stylish look. Don’t be afraid to experiment with different styles and products to find what works best for you.

The Best Hairstyles and Haircuts for Women with Thin Hair

Introduction

Having thick hair is often considered a blessing, but it can also come with some challenges. Women with thick hair often face issues such as difficulty in managing their hair, heaviness, and frizz. Choosing the right haircut can play a crucial role in enhancing the beauty of thick hair while addressing these issues.

Common Issues Faced by Women with Thick Hair: Thick hair often means a lot of hair, which can make it challenging to manage. It can be time-consuming to wash and dry, and styling can be a daunting task. Additionally, thick hair can become heavy, leading to headaches or neck pain. Frizz is also a common problem that women with thick hair face, which can make their hair look untidy and unmanageable.

Importance of Choosing the Right Haircut: Choosing the right haircut is essential for women with thick hair. It can help to reduce the weight of the hair, make it more manageable, and enhance its natural beauty. The right haircut can add volume and dimension to thick hair while reducing frizz and tangles. It can also make styling easier and more fun.

Some popular haircuts for thick hair are layered haircuts, long bobs, pixie cuts, and shag haircuts. However, it’s essential to choose a haircut that suits your face shape, hair texture, and lifestyle. Consulting with a professional hairstylist can help you find the perfect haircut for your thick hair.

Factors to Consider

When it comes to choosing the perfect haircut for thick hair, there are several factors to consider. These factors include face shape, hair length, and personal style. The right haircut can enhance your best features and complement your overall look.

Face Shape: Different face shapes require different types of haircuts. For example, those with round faces may want to consider haircuts that add volume and height, while those with square faces may want to choose softer, layered haircuts to balance their features. Your stylist can help you determine which haircut will best flatter your face shape.

Hair Length: Thick hair can look great at any length, but the length of your hair can impact the overall style and maintenance required. Shorter haircuts are generally easier to maintain, while longer haircuts can provide more styling options. You should also consider the texture of your hair when choosing a length.

Personal Style: Your personal style is a crucial factor in choosing the right haircut. It’s important to choose a style that reflects your personality and makes you feel confident. You can also consider factors such as the level of maintenance required for the haircut and whether it fits your lifestyle.

In addition to these factors, it’s essential to work with a stylist who understands thick hair. Thick hair has its unique challenges, and not all hair stylists know how to work with it. A stylist who specializes in working with thick hair can help you choose a haircut that enhances your features and works with the texture of your hair.

In summary, choosing the perfect haircut for thick hair requires careful consideration of your face shape, hair length, and personal style. It’s also essential to work with a stylist who understands thick hair to ensure the best possible results.


Best Haircuts for Thick Hair Women

Thick hair can be a blessing and a curse. While it has volume and texture, it can also be difficult to manage and style. Choosing the right haircut for thick hair can make all the difference in terms of ease of styling and overall appearance. Here are some of the best haircuts for women with thick hair:

  1. Layered Haircuts: Layered haircuts work well with thick hair as they help to remove bulk and add movement to the hair. These haircuts involve cutting the hair into layers of different lengths, which creates texture and volume.
  2. Blunt Cuts: Blunt haircuts involve cutting the hair in a straight line without any layers. This cut is perfect for women who want to keep their hair at one length while still maintaining thickness.
  3. Shaggy Haircuts: Shaggy haircuts are another great option for women with thick hair. They involve cutting the hair into layers of different lengths and adding choppy ends, which creates a messy, textured look.
  4. Pixie Haircuts: Pixie haircuts are a bold choice for women with thick hair. This haircut involves cutting the hair short and close to the head, which can help to remove bulk and create a more manageable style.
  5. Bob Haircuts: Bob haircuts are a classic choice for women with thick hair. They involve cutting the hair into a chin-length or shoulder-length style, which helps to remove weight and add movement.

It’s important to note that the best haircut for you depends on your personal style, face shape, and hair texture. A stylist who understands thick hair can help you choose the right haircut that complements your features and works with your hair type. Consider bringing in pictures of hairstyles you like to your stylist to help guide the conversation.


Maintenance and Styling Tips

Thick hair requires special maintenance and styling techniques to keep it healthy, shiny, and manageable. Here are some tips for maintaining and styling thick hair:

  1. Use the Right Products: Choose hair products specifically designed for thick hair, such as shampoos and conditioners that are formulated to moisturize and nourish thick strands. Look for products that contain natural oils and ingredients like coconut oil, argan oil, and shea butter, which can help to tame frizz and add shine to your hair.
  2. Avoid Excessive Heat Styling: Too much heat styling can damage your hair, causing it to become dry, brittle, and prone to breakage. If you must use heat tools, like curling irons or straighteners, make sure to use a heat protectant spray first, and avoid using high heat settings.
  3. Incorporate Braids and Updos: Braids and updos are great styles for thick hair, as they can help to keep your hair under control and prevent tangles. Try experimenting with different braided styles, like fishtail braids or Dutch braids, and consider incorporating braids into your updos for added texture and interest.
  4. Use a Wide-Tooth Comb: When brushing or combing your hair, always use a wide-tooth comb to avoid pulling or snagging your hair. Start at the ends of your hair and work your way up, gently detangling any knots as you go.
  5. Don’t Over-Wash Your Hair: Over-washing your hair can strip it of its natural oils, leaving it dry and damaged. Try to limit your hair washing to 2-3 times per week, and use a dry shampoo in between washes to keep your hair looking fresh.

By following these tips, you can help to keep your thick hair healthy, shiny, and manageable. Remember, every person’s hair is unique, so experiment with different products and styling techniques to find what works best for you.